Objective
Integrating PostHog with Retool.
Why is this useful?
Retool is a platform you can use to quickly build internal tools that leverage your data from different sources with little to no-code.
Prerequisites
To follow this tutorial along, you should:
- Have deployed PostHog.
- Have a Retool account
Step-by-step instructions
Retool app setup
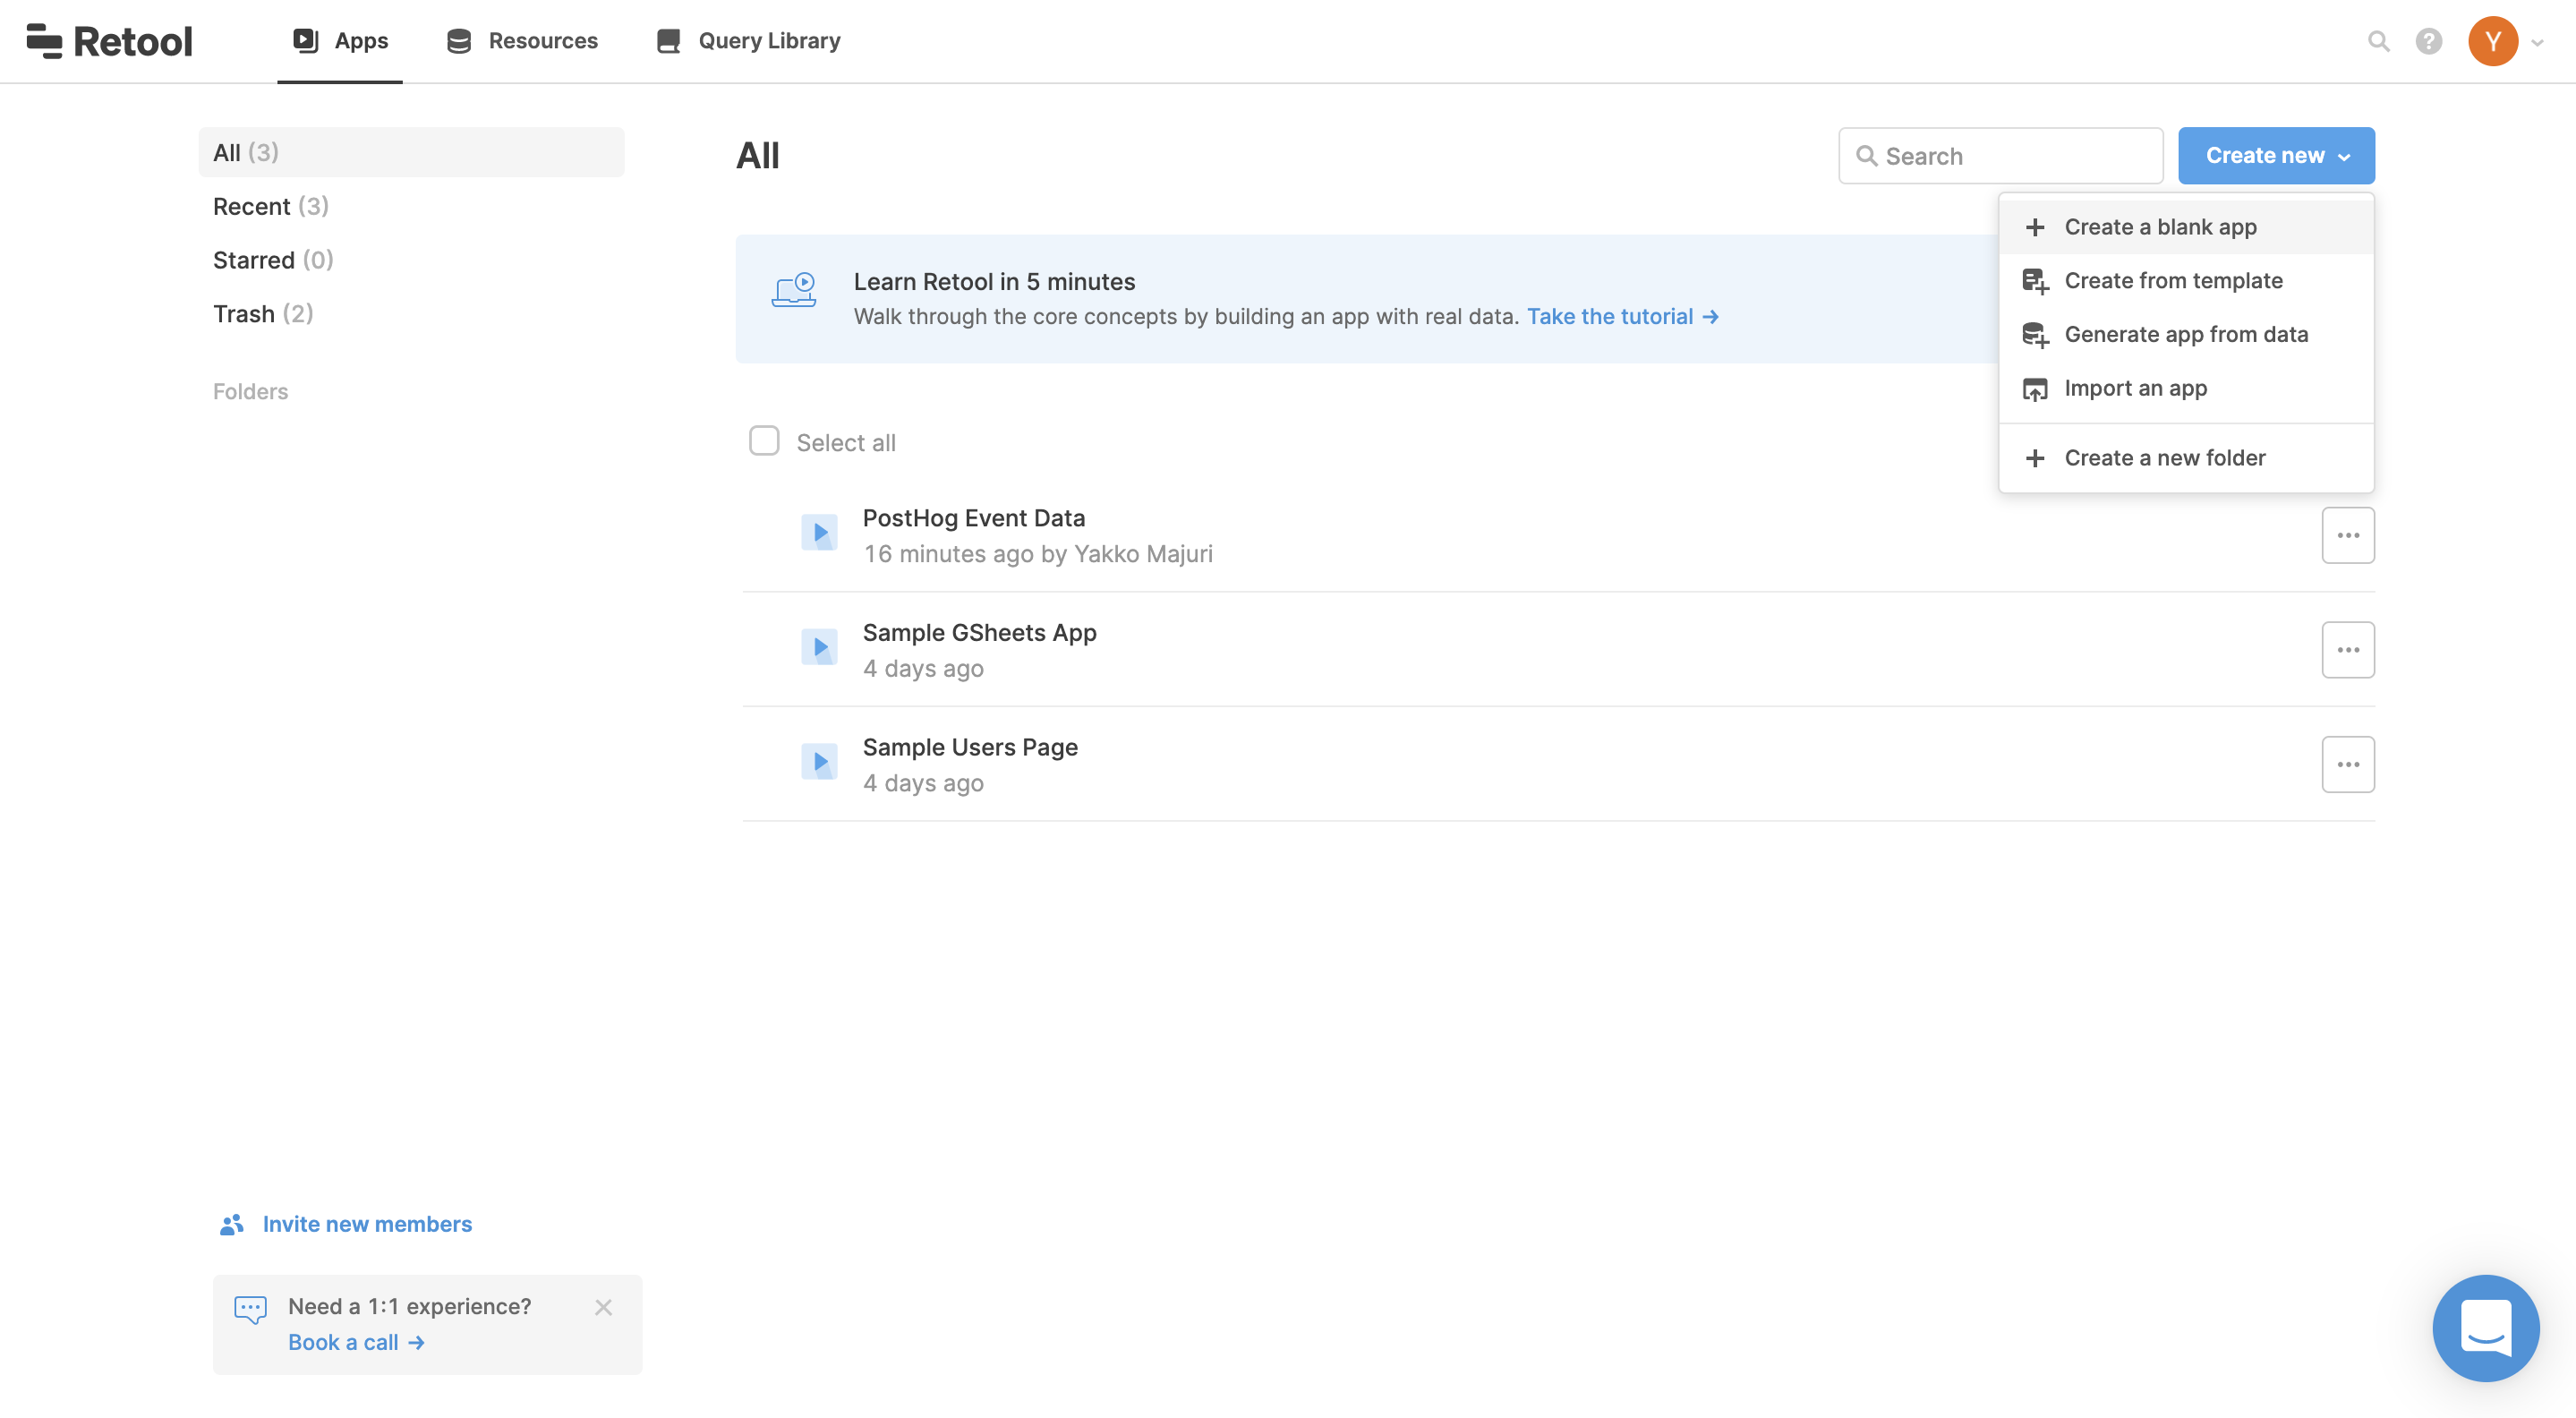
First, create a new app from the Retool dashboard:

You will then need to create a new resource i.e. set up the configuration for where you'll pull the date from. If you have not created any resources before, Retool will prompt you to create one.
Otherwise, you can add a new resource on the queries tab at the bottom of the page, by creating a new query and selecting '+ Add a new resource' on the query tab.
The resource you create will depend on how you use PostHog. If you're self-hosting our open-source version you can connect Retool directly to your PostgreSQL database. However, if you're using PostHog Cloud or our enterprise offering, you should use our API. Regarding the enterprise offering, this is the case because Retool does not yet integrate with ClickHouse.
If you're on EE, we still use Postgres for certain types of data which you could use with Retool, but you'll have no access to event data, for example.
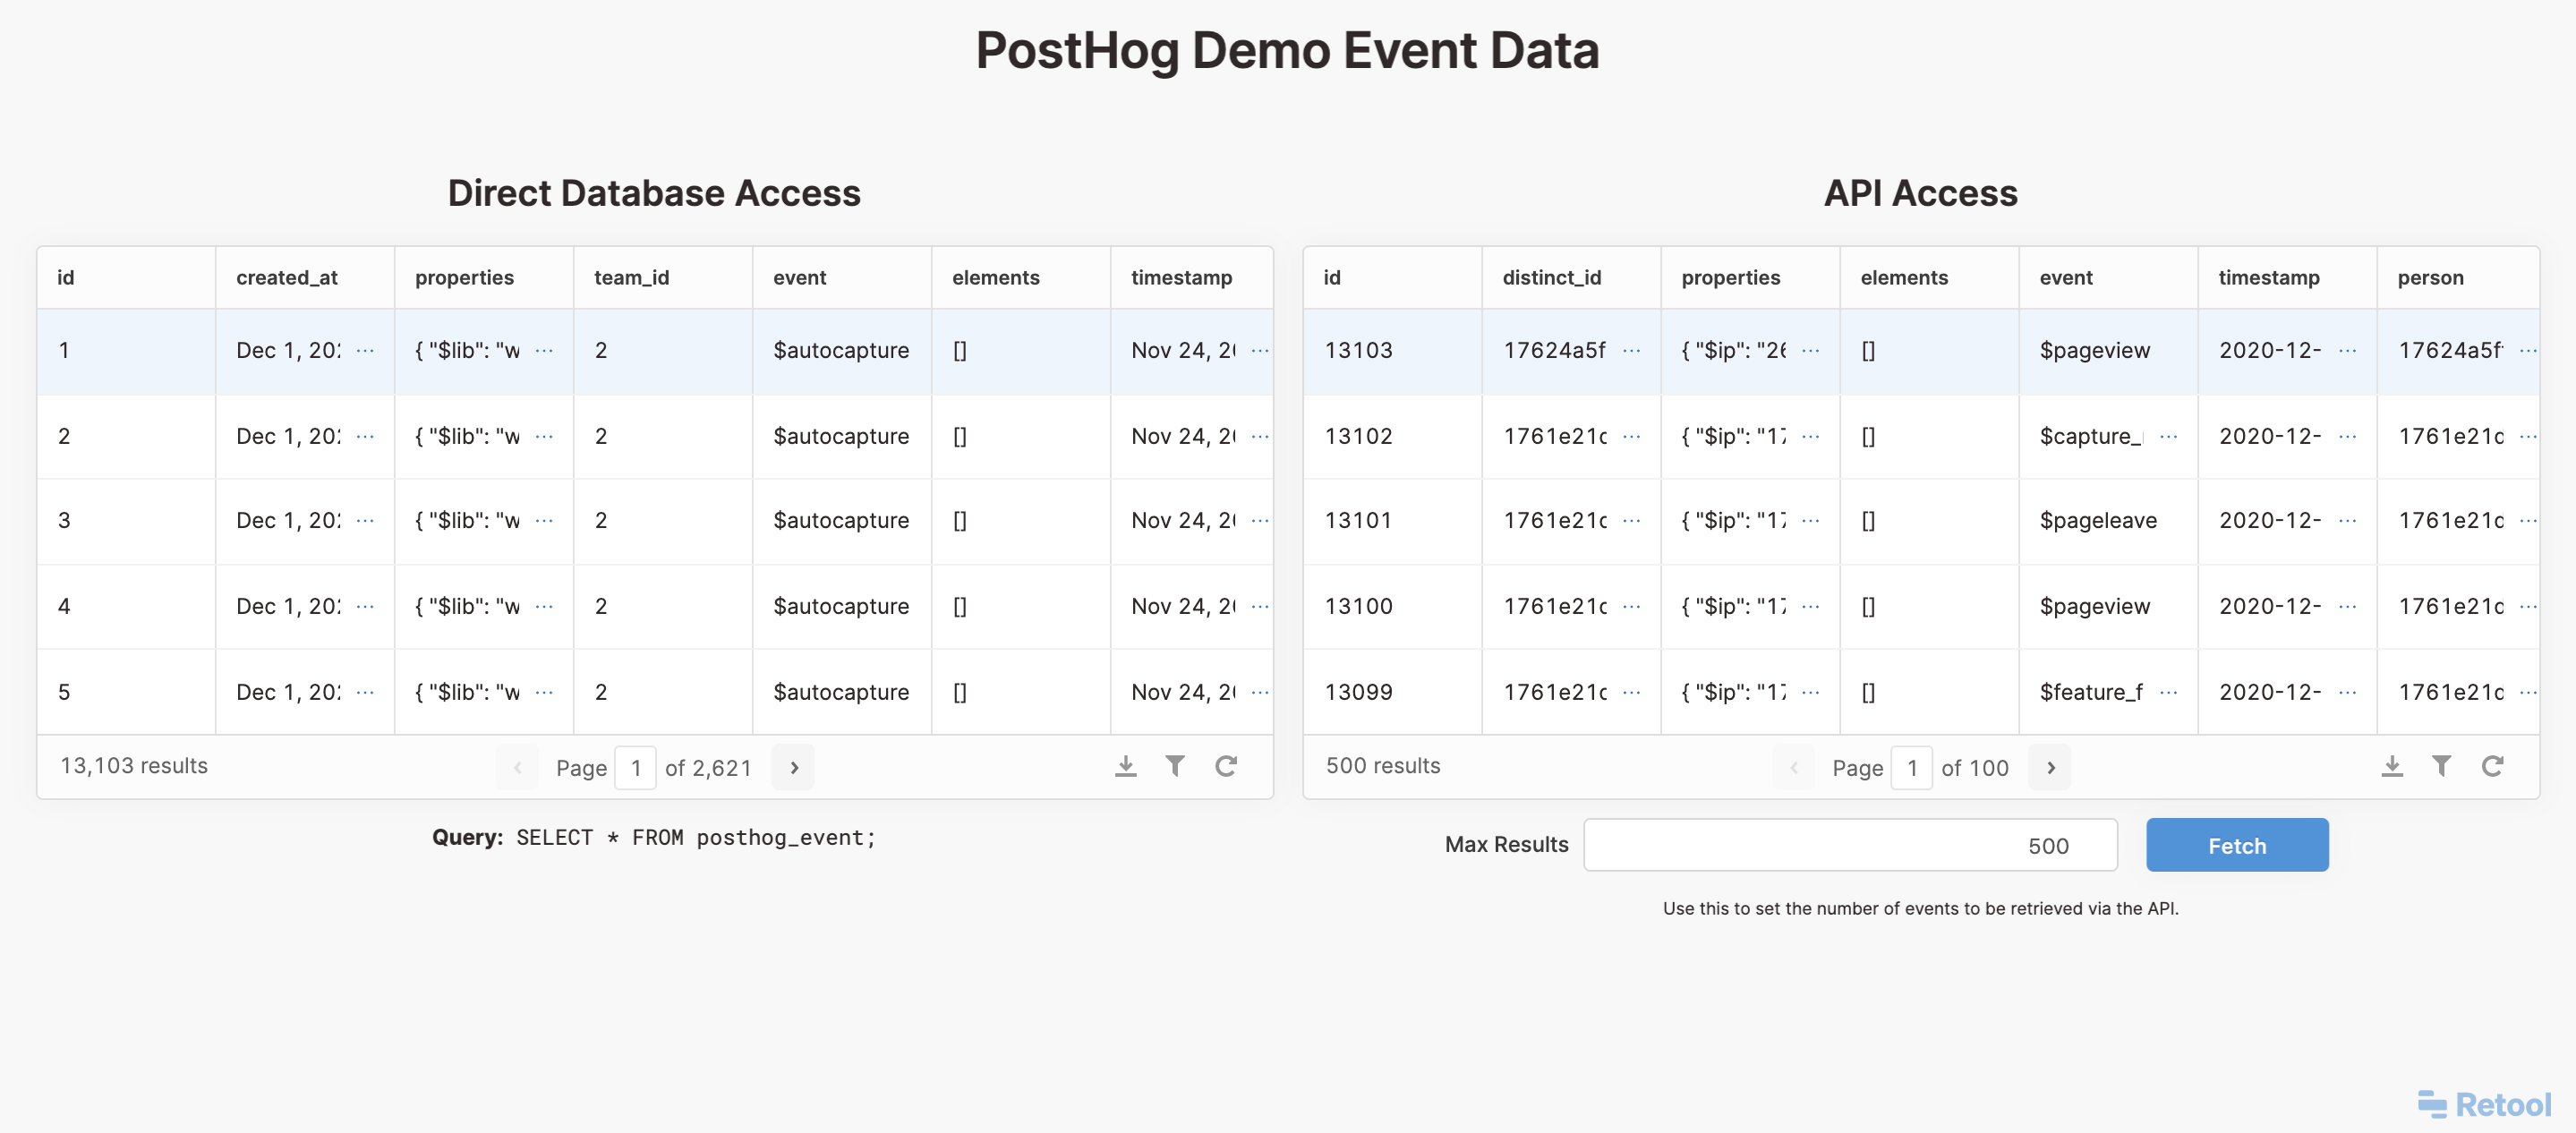
API access is significantly slower, especially since we need to setup a way for Retool to handle pagination on our endpoints.
To see the difference in speed, check out our demo Retool app:

Integrating directly with PostgreSQL
Integrating Retool with PostgreSQL directly is rather simple.
- When creating a new resource, select the PostgreSQL integration.
- This will prompt you to enter your database details, which are the same authentication parameters you use to connect the database to PostHog.
- With the connection complete, you are now able to run SQL queries on your PostHog database and use the result on Retool tables, charts, and any other component available. Retool also makes the database tables and their respective schemas available to you, making the process of writing queries easier.
Note: Where your Database credentials will be available to you is dependent on the deployment method you used. If you deployed PostHog on Heroku, you can find them on the settings for the 'Heroku Postgres' add-on. In the case of AWS CloudFormation, these are available on the RDS settings. And, most importantly, if you deployed PostHog using Docker, some additional setup is required to allow Retool to connect to the database.
Integrating via API
When creating a new resource, select "REST API".
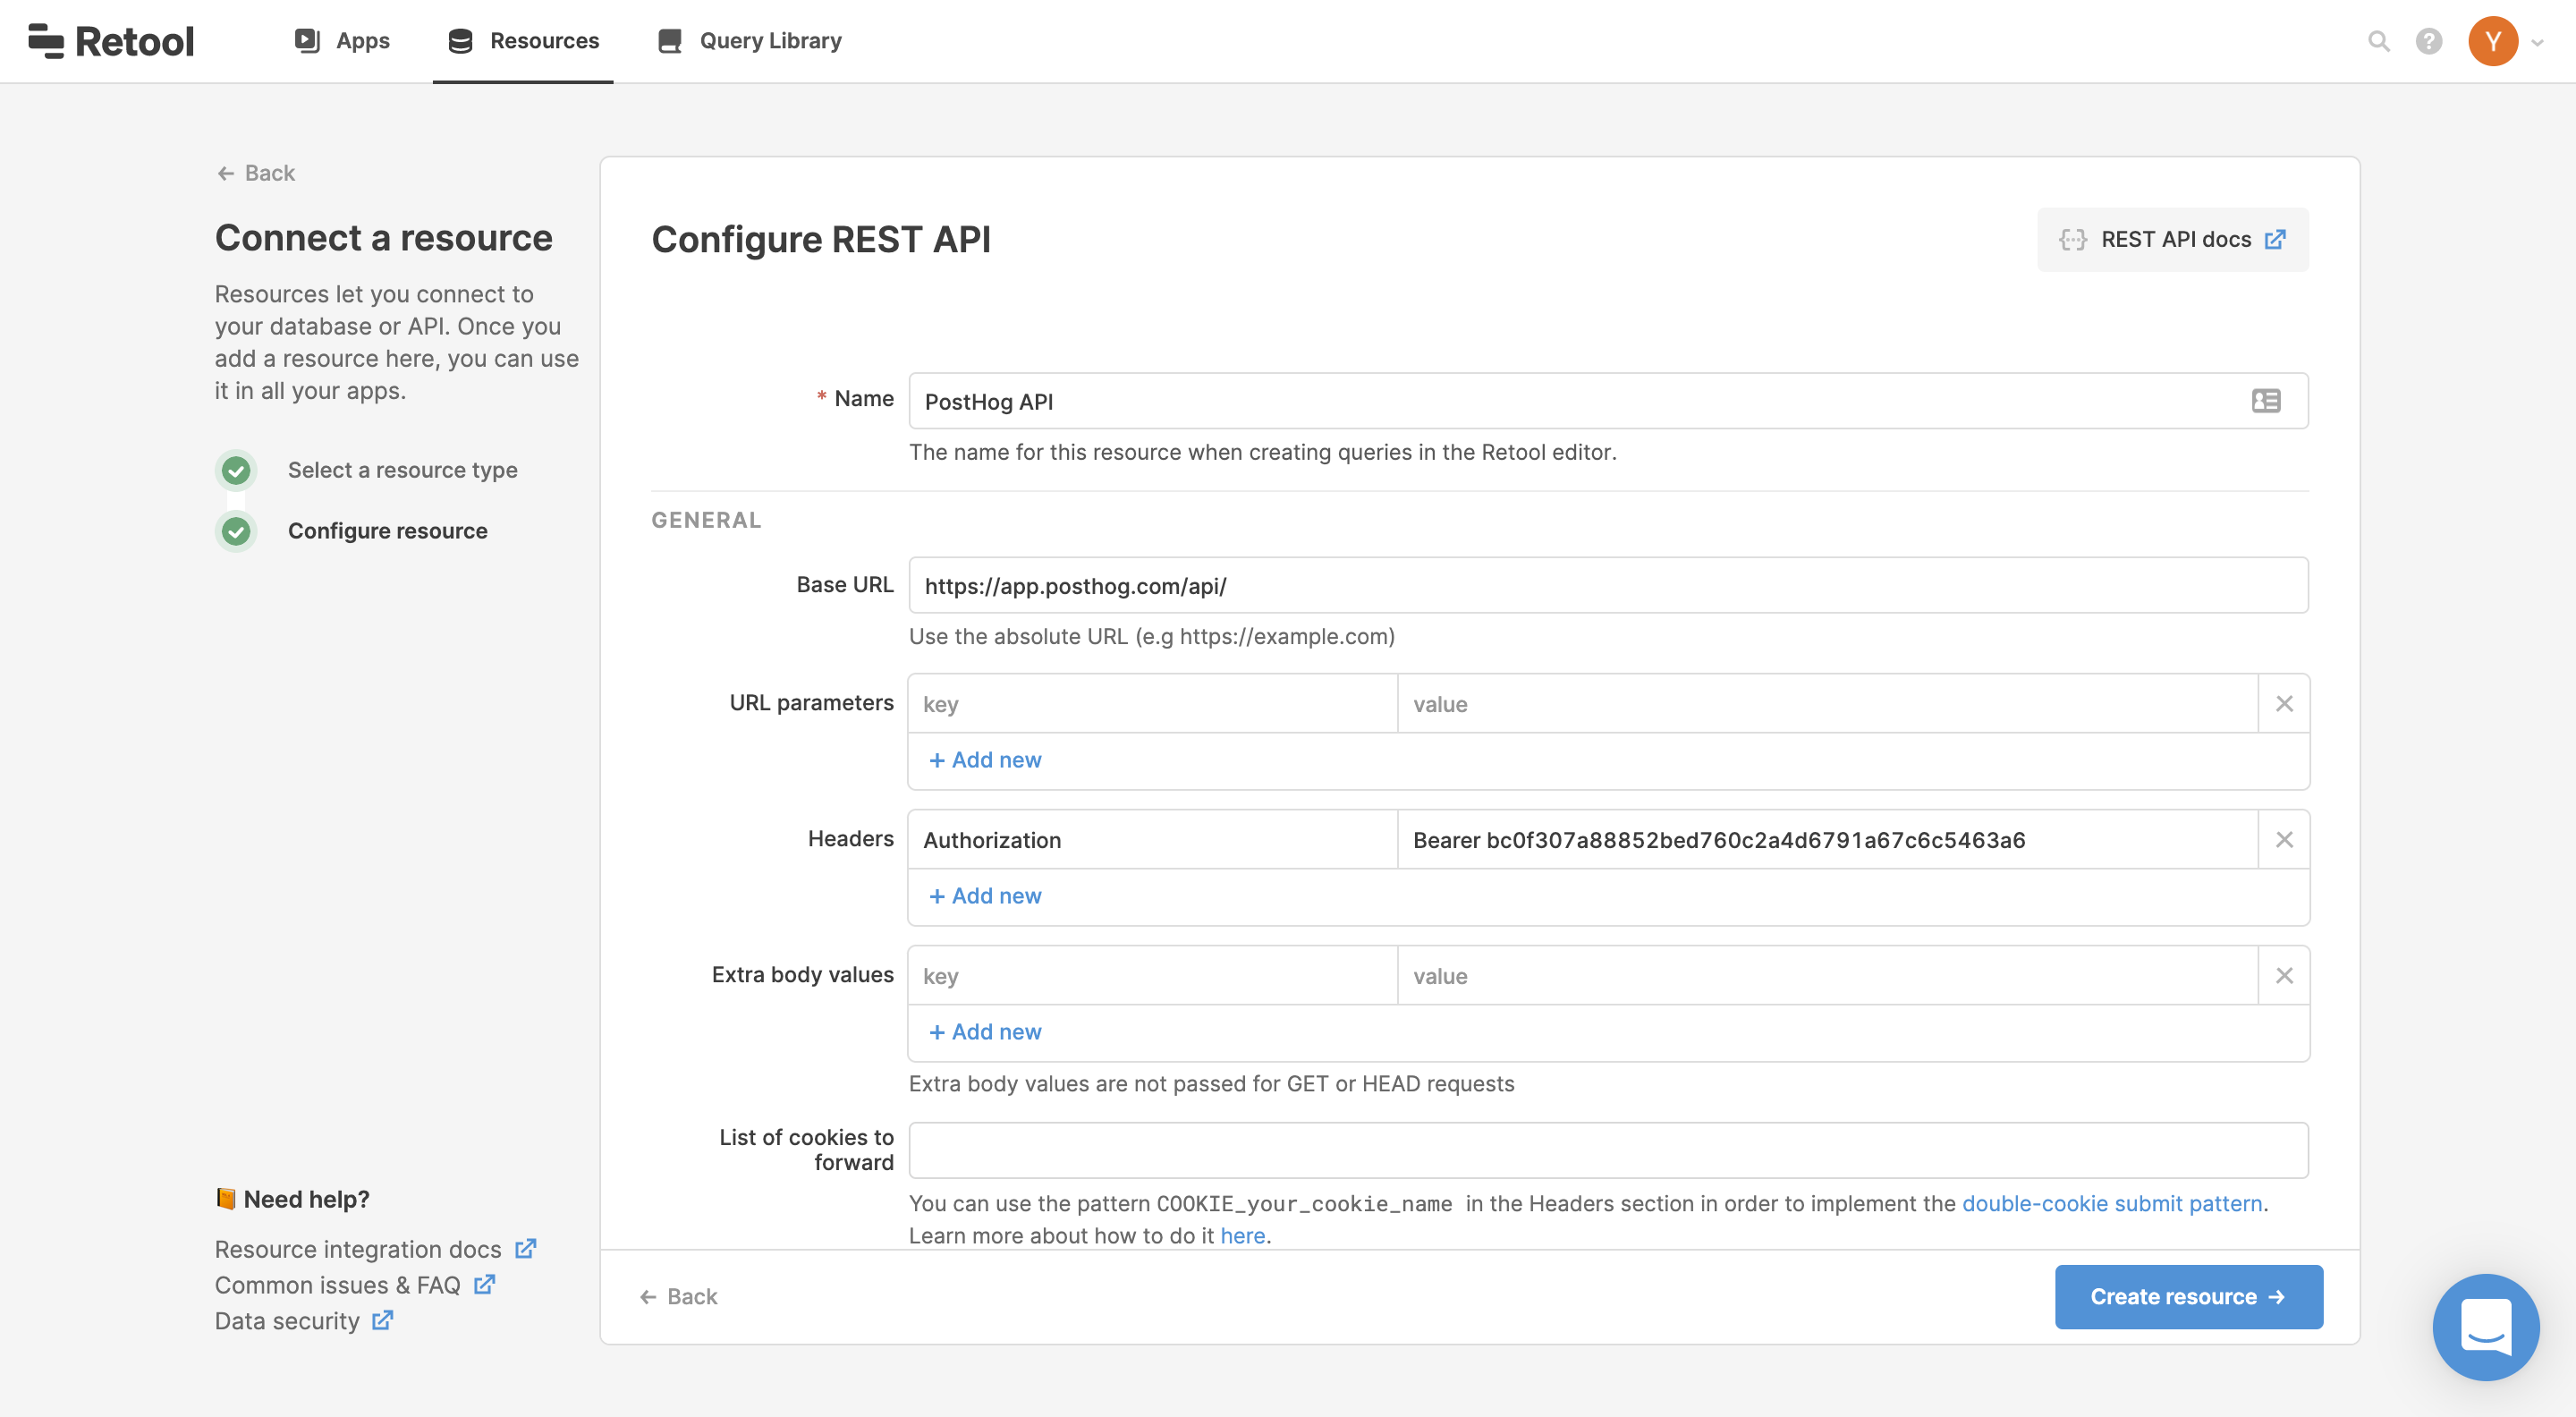
This will open a configuration page for the API resource:

On the configuration page, use
https://app.posthog.com/api/for the 'Base URL' if you're using PostHog Cloud. Otherwise use the address of your PostHog instance, followed by/api/. Then, on the 'Headers' section, configure a header calledAuthorizationwith valueBearer <YOUR_PERSONAL_API_KEY>. For more information on API authentication, see our dedicated page for this.Click 'Create Resource' and you should now be able to connect to PostHog endpoints through Retool queries. For information on our endpoints, see our API Documentation.
For some of our endpoints, this configuration is enough. However, endpoints like
/eventand/personhave pagination, which Retool does not support out of the box. As such, follow the next steps for instructions on how to handle PostHog's pagination with Retool.
Handling pagination with Retool
To handle pagination in Retool and show results beyond the first "page", we need to do some Retool magic.
Note: This example will teach you how to handle pagination on our endpoints that use cursor-based pagination, such as
/person. Trying this with the events endpoint will not work. We are working on a tutorial for that, but Retool requires extensive workarounds to make it work.
First, create a new query that uses the PostHog API resource and input the endpoint you want to use.
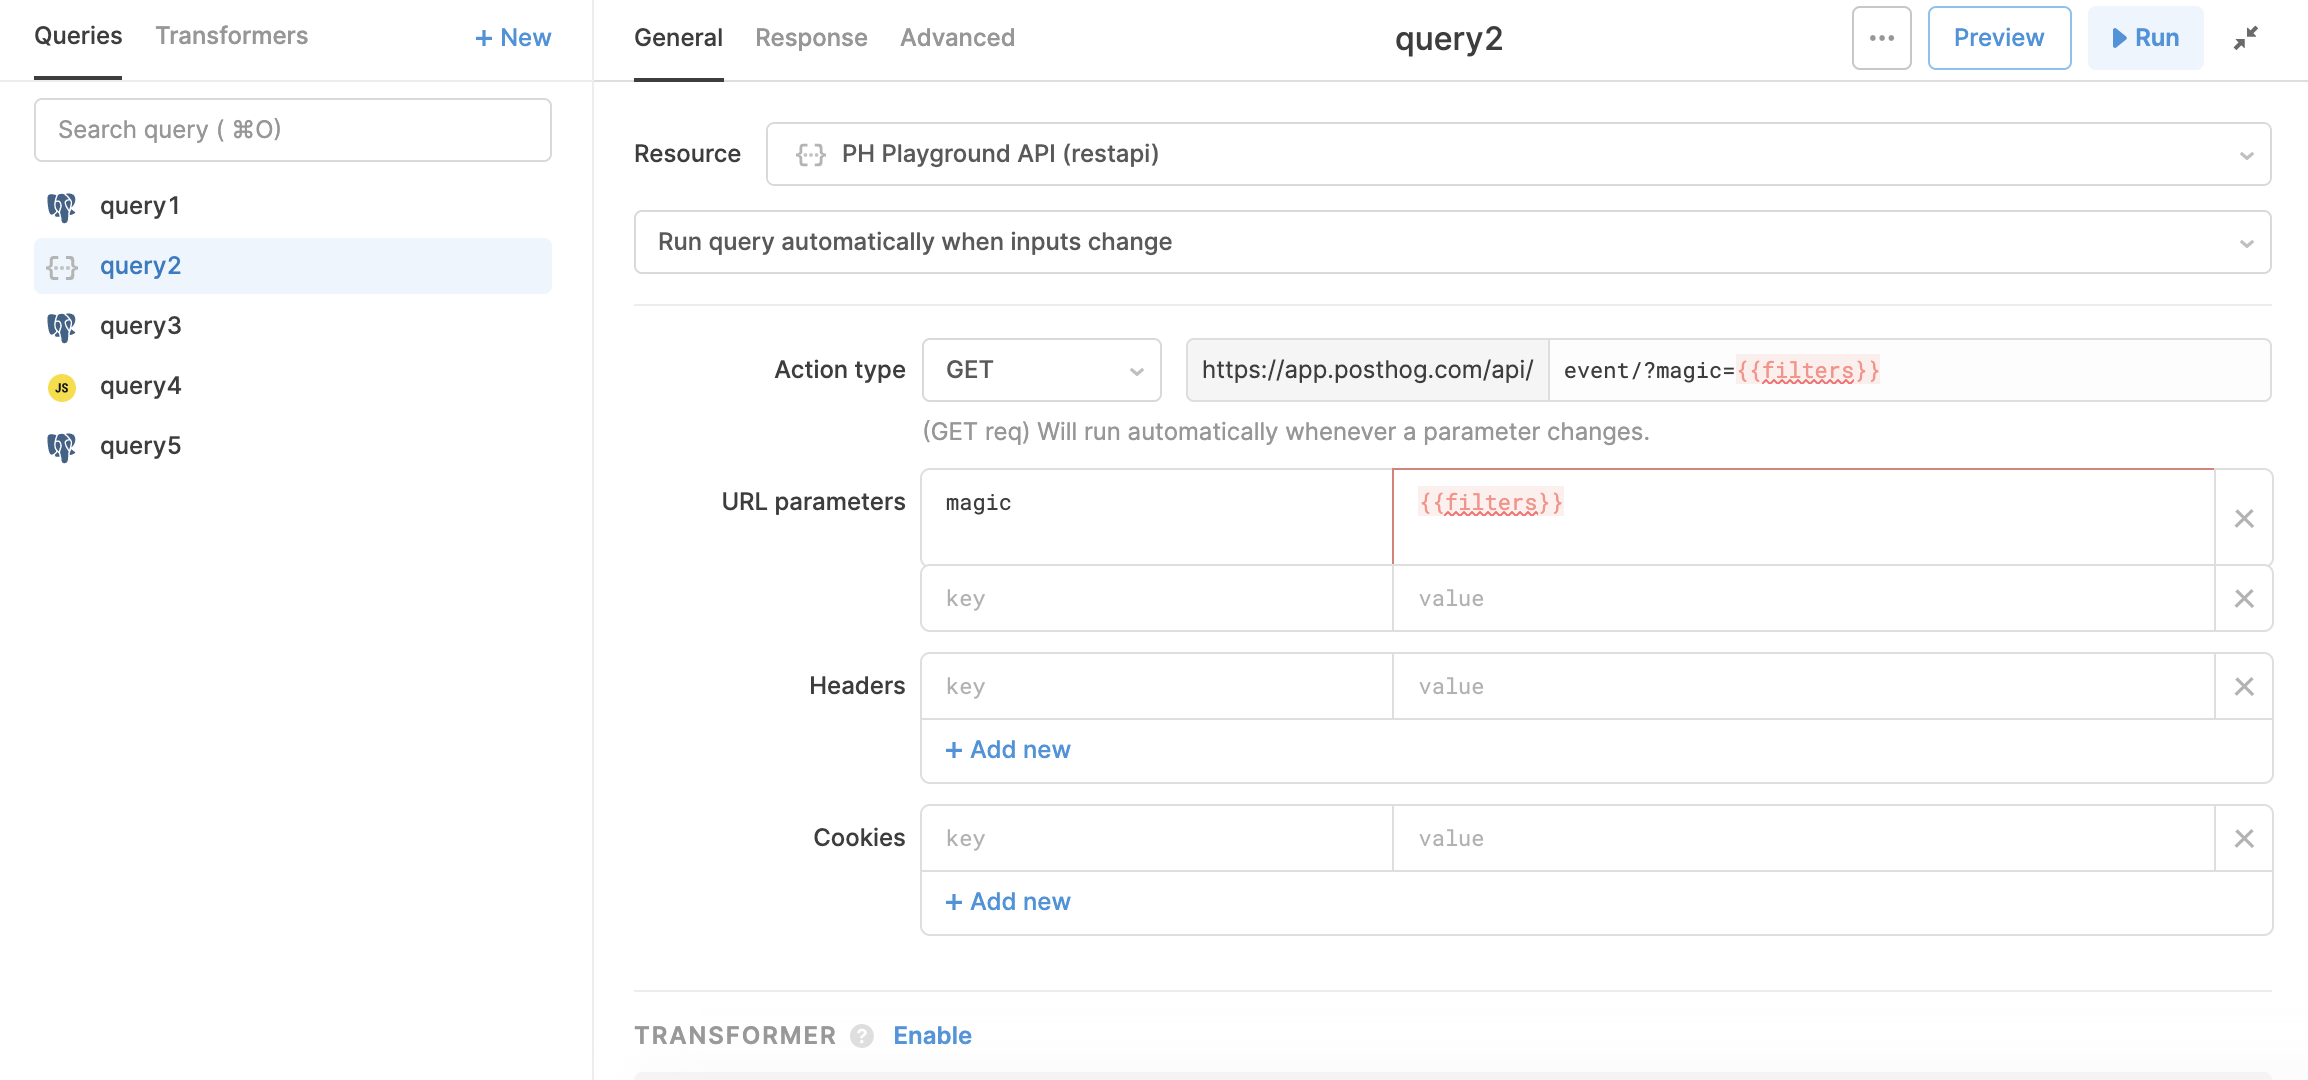
Then, add a 'URL parameter' called
cursorand set its value to{{cursor}}. Here's what the config will look like:
Retool will complain about
cursornot being defined, but that's OK. This is the recommended way to handle paginated API endpoints while that isn't supported natively. "Save and run" your query. It will fail as expected.Now, create a new query, using the 'Run JS Code (javascript)' resource. On the text editor, paste the following:
JavaScriptconst fetchMany = (cursor, results, n) => {// Return results if limit reached or all records fetchedif (!cursor || n === Math.ceil(Number(textinput1.value) / 100)) {return results}return new Promise((resolve) => {return query1.trigger({additionalScope: {cursor // Set the cursor URL param},onSuccess: (queryResult) => {// Join with results from the previous requestconst newResults = results.concat(queryResult.results)let nextCursor = ""if (queryResult.next) {// Decode cursor value so Retool can re-encode itnextCursor = decodeURIComponent(queryResult.next.split("?")[1].slice(7))}return resolve(fetchMany(nextCursor, newResults, n + 1))}})})}return fetchMany(" ", [], 0)This JavaScript query will inject the
cursorvalue as the undefined URL param from the previous step and run until the API has returned all the results or a limit specified in a text input has been reached. In this case, we are reading the number of records to fetch fromtextinput1. You can see how this works in our demo Retool app, and can remove the logic associated with the text input if you prefer.Lastly, set a component to read the data from your query (by setting 'Data' to
{{your_js_query.data}}) and determine the triggers for running it (e.g. on page load).
And that's it, enjoy having your PostHog data in Retool!